


UIPath is an incredibly competent and capable Robotic Processing Automation (RPA) solution. We utilize UIPath exclusively at Optezo to bring value to our clients. In this article we're going to install UiPath Orchestrator in Azure App Services, step-by-step. In part 1, we'll walk through the creation of the underlying Azure services required for installation, including resource groups, SQL Server, the App Service, and App Registration. In Part 2, we'll run the installer and walk through the command line installation instructions in PowerShell.
As this solution is primarily Windows based – specifically the core components of UIPath Orchestrator and Robots, a typical scenario is installing Orchestrator in Virtual Machines, either in an on-site Data Center or in the Cloud.
This is an acceptable solution, but with the rise of App Services on Azure, we have some other options available to us. These options allow for faster scaling (up & out), redundancy, built in high availability, and a more flexible distribution model. All while being faster to deploy. For new folks to Azure or UIPath, it can be a bit daunting. Here's a breakdown of the process with screenshots and some of my notes about how to setup & configure.
There are two parts to this post. In this post we'll create the Azure SQL Database, App Service and some other plumbing. In Part 2, we'll continue with the UIPath install script and walk through the process of finalizing the install.
A caveat: This is a simple, single Orchestrator install on Azure App Service. A future post will look at a High Availability scenario utilizing Redis, as well as the inclusion of an Elastic Search instance. For now, let's keep it simple.
Let's get started.
Resource Group
Azure Resource Groups (RG) are really the bedrock of our install, and our RG is going to house all of the UIPath components for this simple install. If you want to follow along with this guide, create a new Resource Group with the name rg-shared-dev-002. It's not a pretty name, but it's ours.
SQL Server Database Creation
Let's create our SQL Database first before we create the App Service. Azure provides many different ways to configure the licensing and use with SQL Server. For example, Elastic Pools are a great way to have a large number of databases sharing compute resources – allowing the grouping of many databases to support a large infrastructure of applications. Serverless allows very fast scalability and per-use SQL Server capabilities billed at a "per-second" billing basis and allows auto-shutoff for downtimes - perfect for workloads that spike at different times, but can have periods of low usage as well. For higher demand workloads and more management flexibility, there's the ability to create a Managed Instance. Or simply create a Virtual Machine with SQL Server installed.
For the purpose of this guide, we're going to use a 20 DTU (Database Transaction Units) "Standard" database. Orchestrator can have some peaks in use, but the demand is predictable. We primarily require the ability to capture a steady stream of requests from both robots and Orchestrator requests. Depending on your needs, and watching the resource consumption of the database, this Single Database can be scaled up later if needed.
Let's start.
- First go into the Resource Group we created earlier.
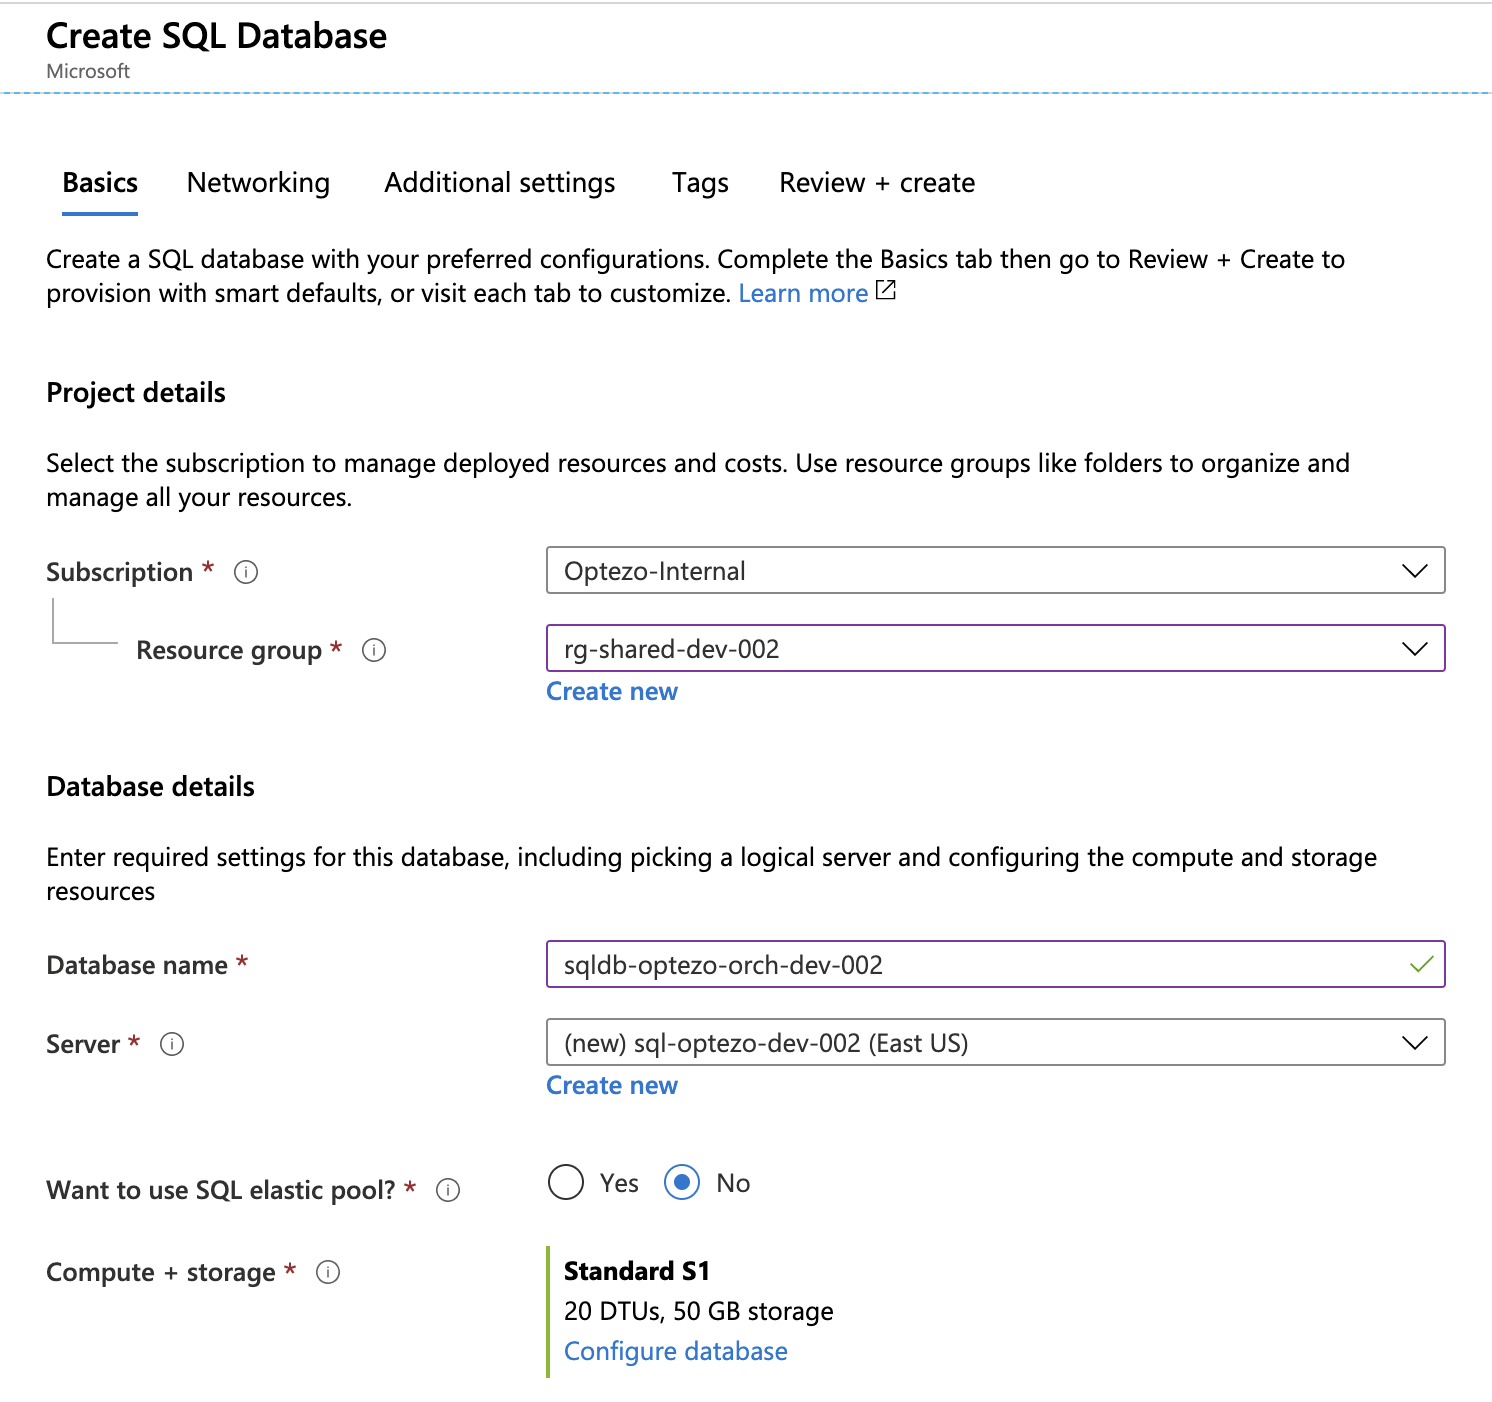
- Hit +Add and select SQL Server. Create a new SQL Database. Ensure the Subscription & Resource Group are correct, enter a new database name and create a new database server. For this, we'll size to a Standard S1 database, set at 20 DTUs with 50GB of storage.
- When creating the database server, Azure will ask to create a new admin username & strong password. Be sure to capture and hold onto this SQL administrator username and password in a centralized password archive.
- If your organization does so, be sure to add tags to these resources to help with later identification and billing.
- Under networking, there are a few settings here to highlight. First, we have "Deny public access" set to "Off". This is slightly confusing as this is an overriding firewall rule that will ignore future rules. By default, there is no access to the database at all, so we're not allowing public access here, but be are accepting any other policies on this page. There are two connections we need to allow. First, allow Azure service and resources to connect. This will allow other Azure Services (such as App Service) that are contained within the Azure backbone to be able to try to connect. We're also adding a specific client IP address that allows our local PC to connect to the database during the install process to configure the database tables and settings required for orchestrator. To reiterate, your local PC/PowerShell script is connecting to the database as the administrator and populating the needed structure and data.
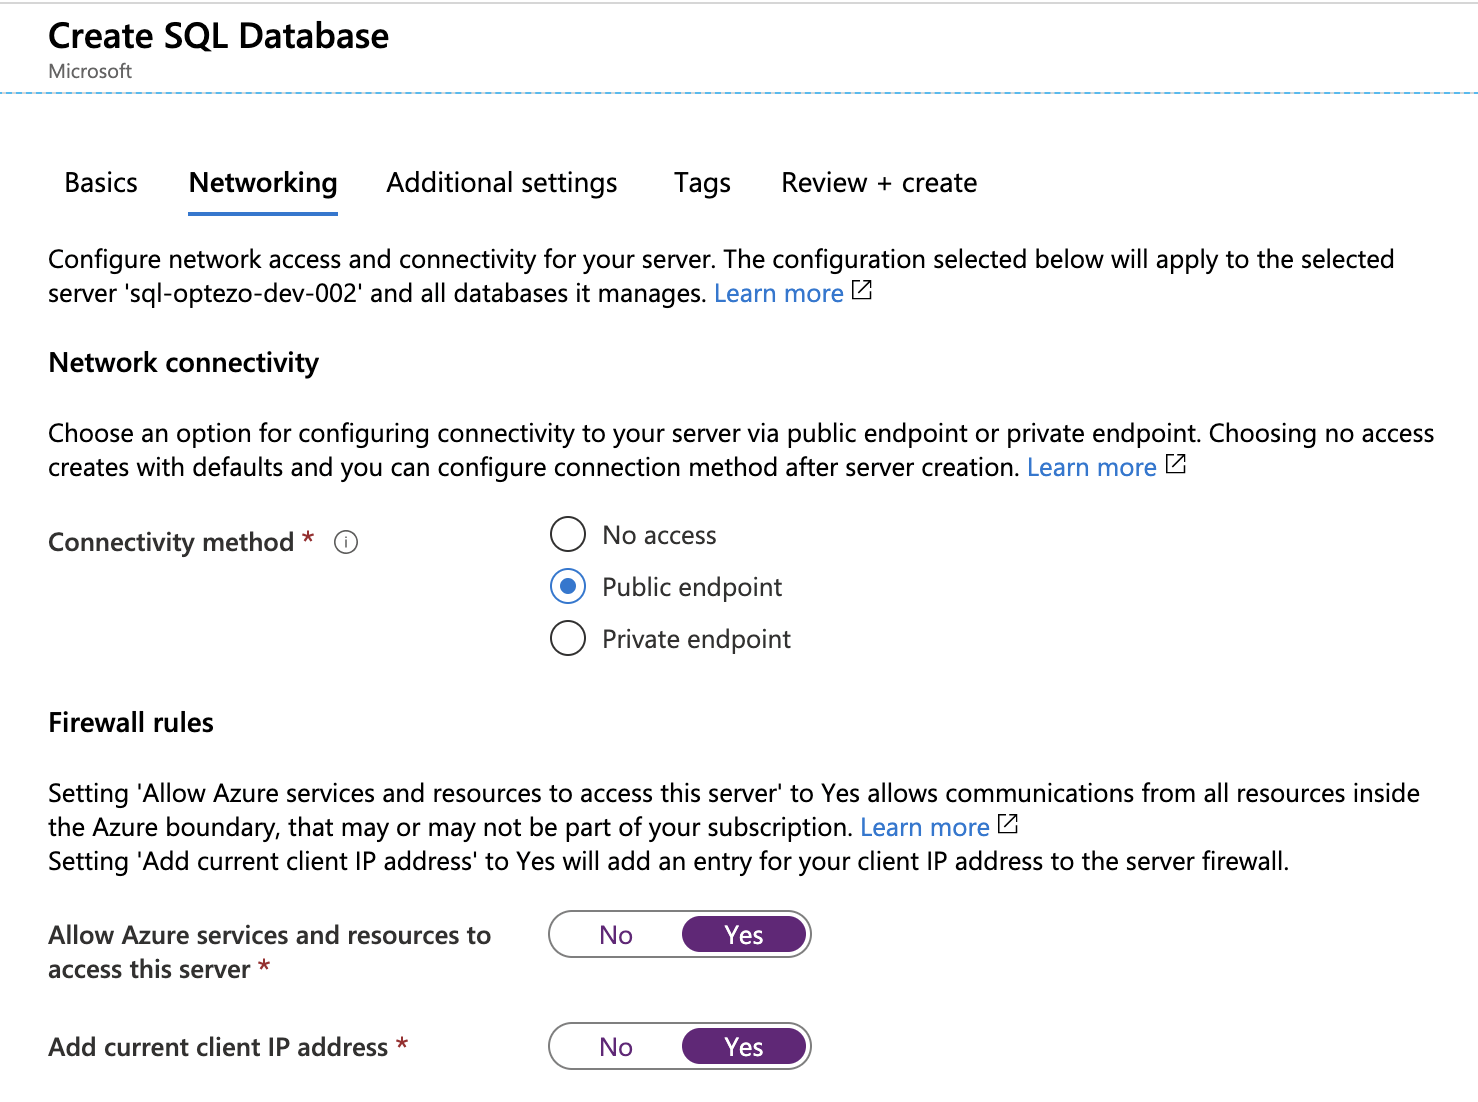
- If you're concerned about Azure App Services and Database communication via this method, it's certainly possible to enable a Virtual Network assignment, create private endpoints for the App Service and SQL Database and allow this communication via this private network. In more complicated scenarios with multiple storage connectors for private NuGet repositories, or separate VPN connectivity from corporate networks to Orchestrator, this may make more sense. For our example here, this is unnecessary. As we have this database listening port locked down to just Azure App Services, we have encryption in flight, and a secure password, this is an acceptable architecture.
- Click Create and allow the deployment to complete.
After deployment, let's get a few items that are needed, including the connection string. Navigate to the database that was just created and click on Connection Strings. Note the beginning of the server connection string, which should be something like Server=tcp:sql-optezo-dev-002.database.windows.net,1433.
Azure App Service Creation
Now that the database is ready, let's create the App Service that will house the Orchestrator process. From the Resource Group created in step 1, hit the Add button again and type in "Web App". Web App is Azure's new control for the easy creation of both an App Service Instance and App Service Plan.
From the creation screen, there are a few items to take note of:
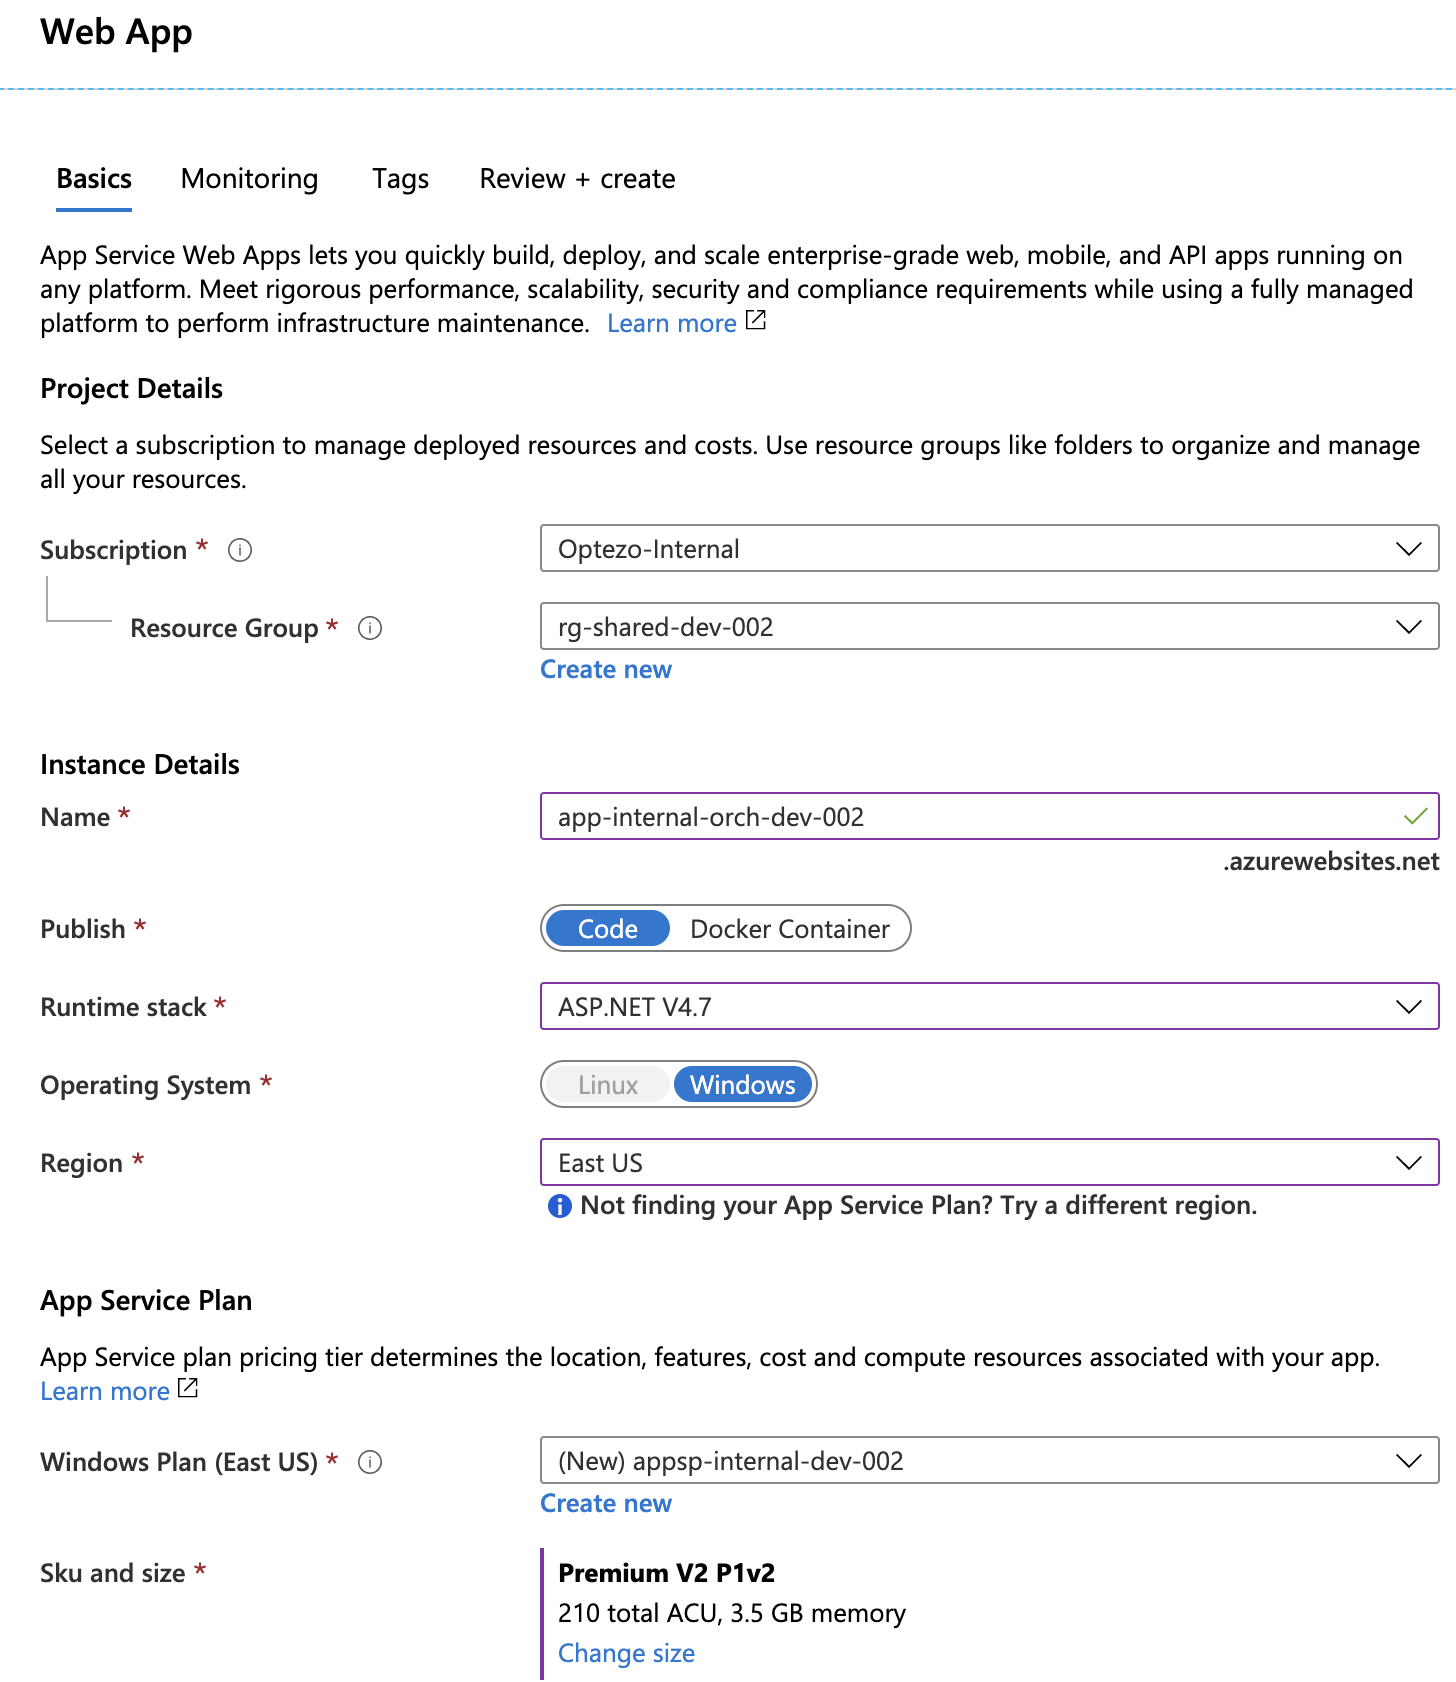
- As before, select the proper Subscription and Resource Group.
- Enter a name for the App Service Instance.
- Select Code, and pick the ASP.NET 4.7 runtime stack.
- Region should match your Resource Group, and should be close to your user base.
- For the App Service Plan, click New, provide a name.
- For the SKU, up to your discretion, but for a production instance with less than 100 bots, choose P1V2. This provides a 210 ACU with 3.5GB RAM, and can support custom domains/SSL.
- For non production workloads and testing, you can chose a D1 or B1 plan in the Dev/Test pricing scheme - recognize that once you do so, you may not be able to scale up this instance to a Production instance in the future.
- Finally, add Monitoring if required, add your environment tags. Review & Create and wait for the deployment to complete.
Before we can utilize the PowerShell to tie these environments, there are a few other things that need to occur:
- Once your deployment is complete, click into the created App Service and click Configuration.
- Go to Connection Strings and add a new Connection string.
- Connection strings are in the format of Name & Value. Set the Name to
Default. The Value is formatted as follows:
Server=<database server public name>;Initial Catalog=<name of database itself>;Persist Security Info=False;User ID=<name of SQL administrator setup in step 2>;Password=<password of SQL administrator>; MultipleActiveResultSets=False;Encrypt=True; Connection Timeout=30;TrustServerCertificate=True
- Finally, under "Type", set the Database type to "SQLServer".
- For our example here, my value is:
Server=sql-optezo-dev-002.database.windows.net;Initial Catalog=sqldb-optezo-orch-dev-002;Persist Security Info=False;User ID=sql-optezo-dev-admin;Password=<databasepassword>;MultipleActiveResultSets=False;Encrypt=True;Connection Timeout=30;TrustServerCertificate=True
- Click Save on the Configuration screen, and the App Service will restart to utilize this new Connection.
App Registration
App Registration is used to integrate the application and service with Azure AD. For our purposes, this is used to allow our local powershell script to attach to the app service & push files to this App Service. This also allows us to create a token/secret for use in the script to push these commands to Azure. Here's the process to get this setup:
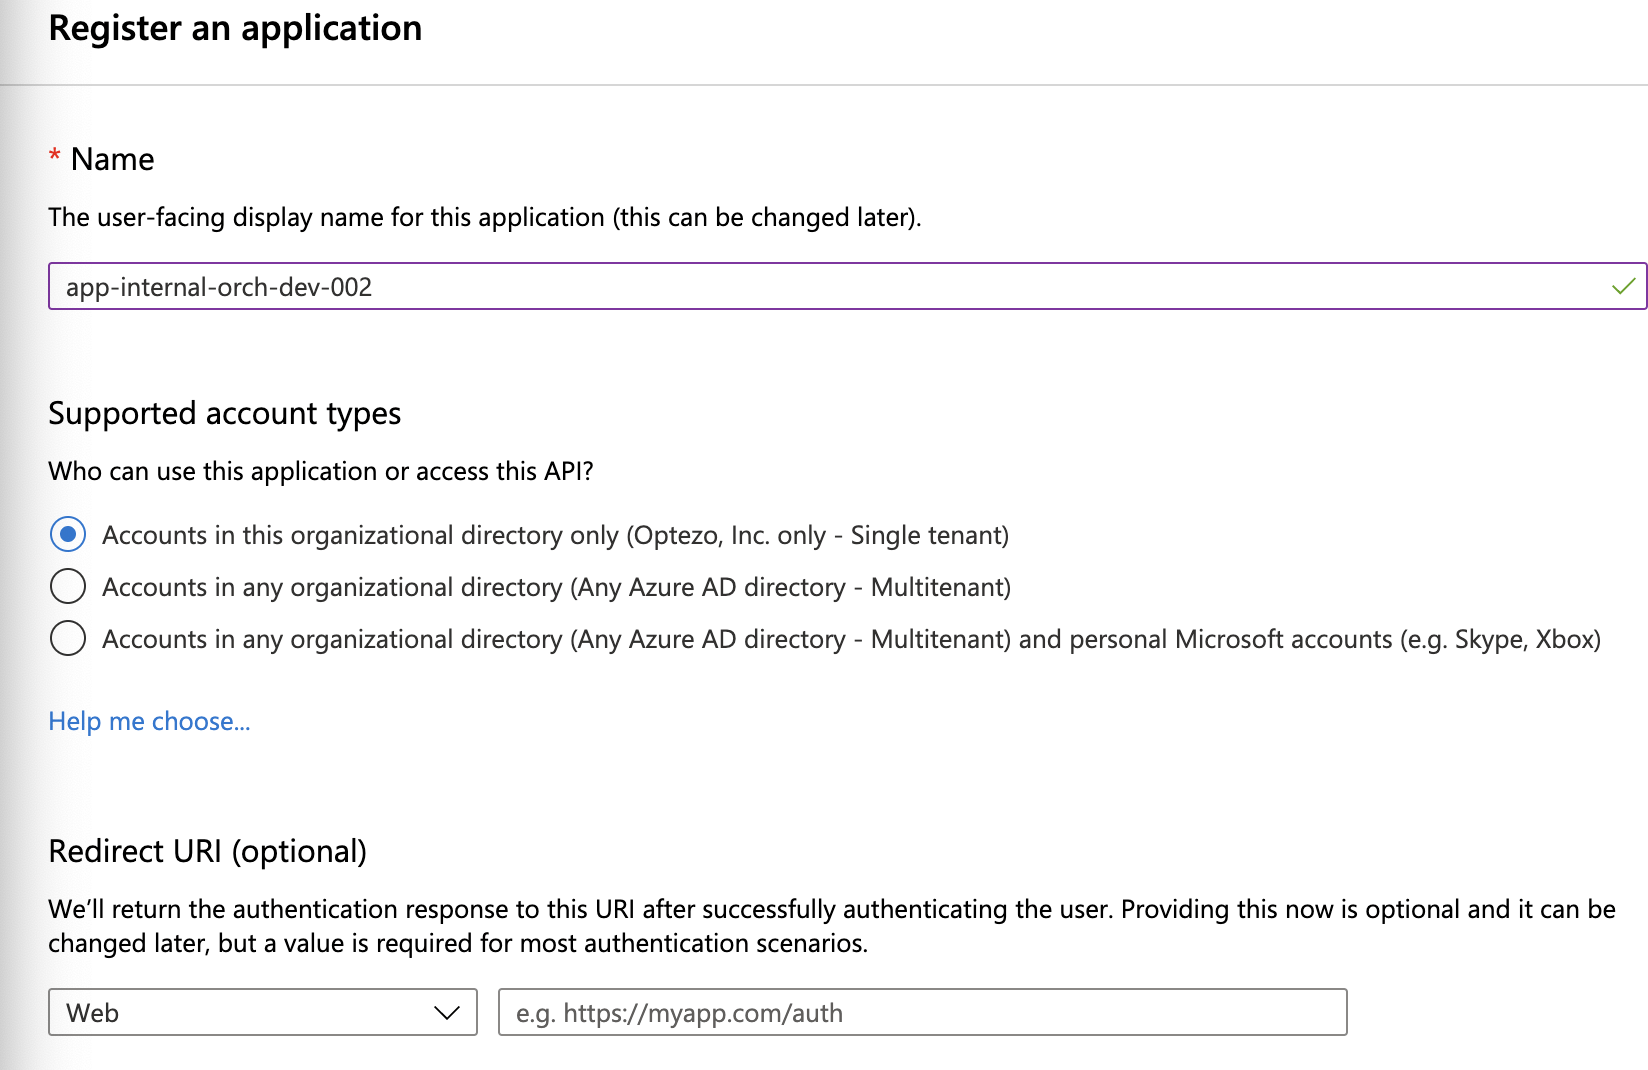
- In the top search bar in Azure, type App Registrations. Click New Registration
- For the name, let's reference the App Service we just created, hit Create
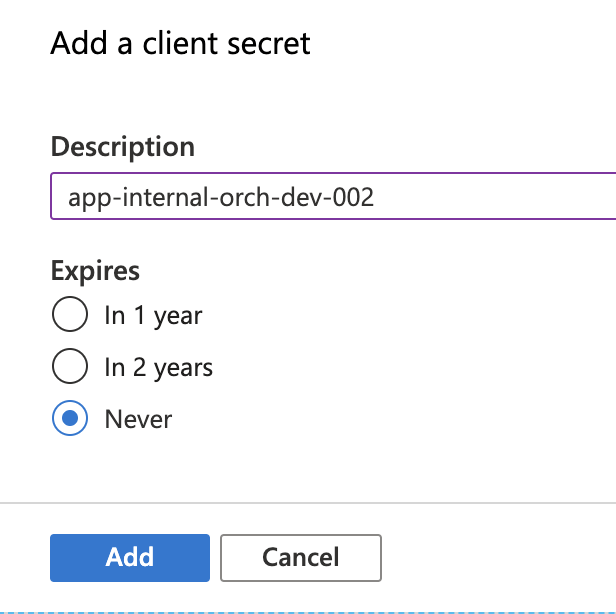
- Within the created App Registration, click on Certificates and Secrets and add a New Secret. Give the description the same title as the App registration and click "Never" under expiration. Note that there is a random secret created - Copy this secret now and paste it somewhere for later use. You will not be able to view this again (you can always create another). This will be used later in the PowerShell script.
- Now that the registration exists, we need to give this registration the proper permissions to push code to the App Service. This is done at the Subscription level.
- Search Azure for Subscriptions and click on the Subscription we're using. Note the Subscription ID UUID string as shown. This will be required later in the PowerShell script.
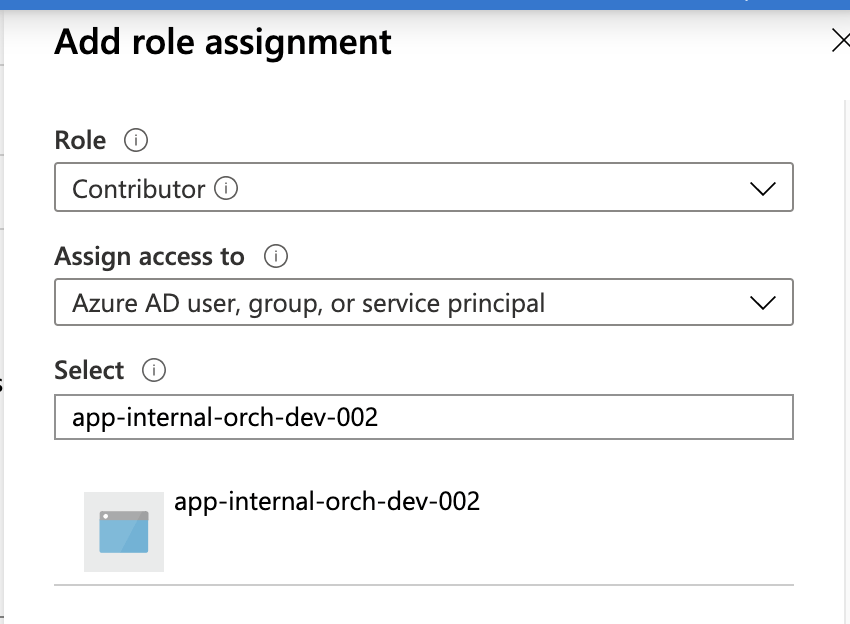
- Click on Access Control (IAM) and then on Role Assignment. Click Add, then Add Role Assignment. Under Role, select Contributor. Assign Access to `Azure AD user, group, or service principal`. Under Select, begin typing the name of the App Registration we just created. You should see the following. Click Save.
- At this point, we've created a key/value pair that can be used in the PowerShell script to push components to Azure App Service. Nice! This Contributor can be used across all instances within this subscription, both in the creation and deletion of objects – so store this value carefully.
We're now ready to run the UIPath PowerShell script to setup the environment! Not bad. Did I get it right? Have suggestions? Reach out to me at @ericjohncarlson.

